|
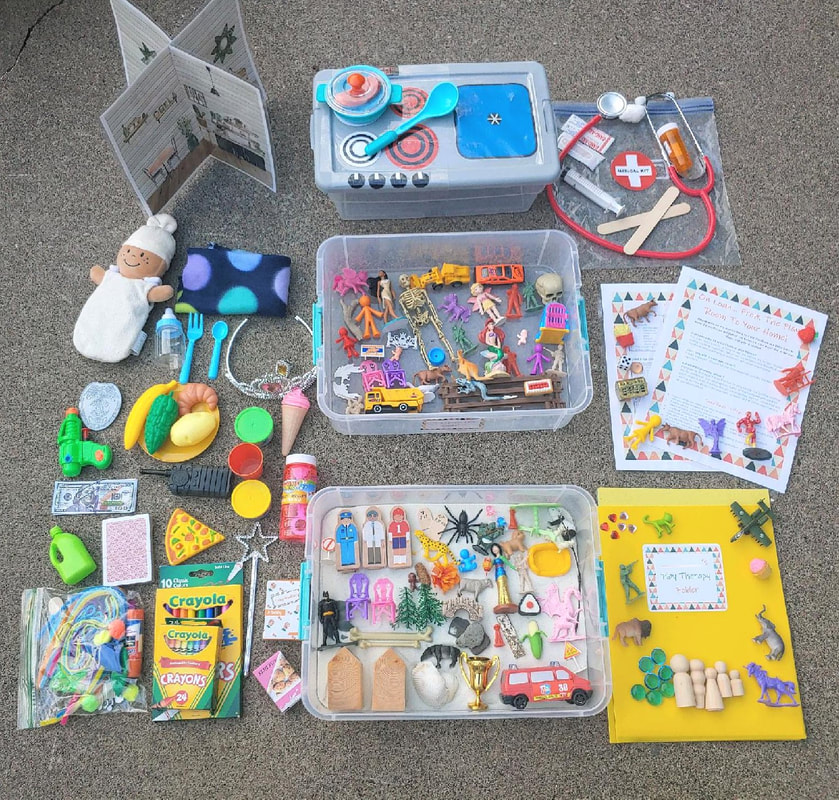
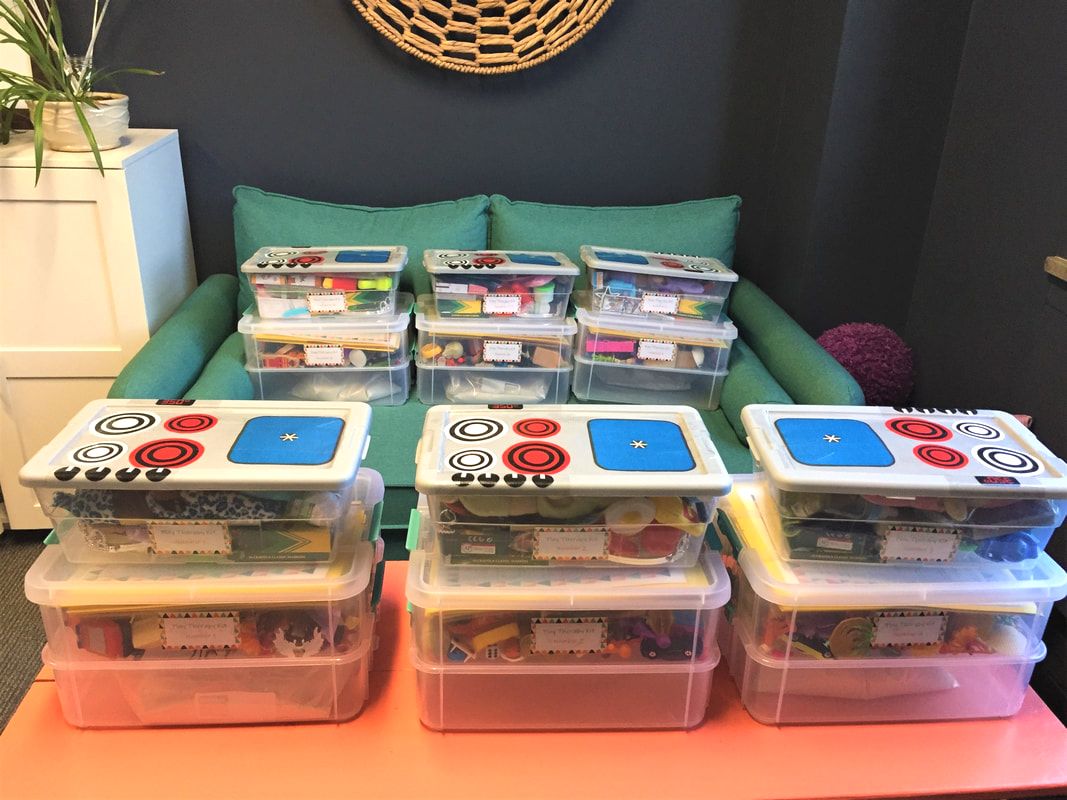
Playing while apart is hard. Playing together with masks and cleaning procedures is hard. Playing is pretty hard in general right now. To make it a teensy bit easier I put together a Portable Playroom In A Tote for my clients to use for play therapy sessions at home. It is a comprehensive play kit that is just a bit smaller than the actual playroom. One that fits in a tote, bag, or rolling suitcase for portability. One of the most frequent questions I get asked by new play therapists is about what toys to buy, most of the time on a budget. It is a struggle as a new play therapist to get a feel for what “should” be in the Playroom while balancing a pretty non existent budget. When it came time for me to start developing Play Therapy Kits for my clients (I talk about the process and pros and cons HERE) I felt like I was starting all over again. I flashed back to my early days of trying to cobble together something that was comprehensive, but feeling very overwhelmed by the 80+ toys that are recommended for Child Centered Play Therapy. Back I went to hours and hours of internet searching, scouring multiple Dollar Tree locations (because not every store has the same darn stuff), and attempting to match, to the best of my ability, the lists and categories of what my young people may need in a portable Playroom. It was definitely a lot of work, but easier this round than last. This kit I created for my clients is pretty comprehensive and includes all categories from Garry Landreth’s categories of toys in his text HERE on Child Centered Play Therapy. Categories of Real Life Toys, Acting Out Aggressive-Release Toys, and Creative Expression and Emotional Release. The kits are also not gendered and they are nearly identical. There is no “boy kit” or “girl kit”, because we don’t want to make assumptions about what a child may or may not need to express themselves. My female identified clients get the scary monsters, army toys, and trucks, and my male identified clients get the dolls, bottles, and princesses. In his text Play Therapy: The Art of The Relationship Garry Landreth also has a toy idea list for a “Tote Bag Playroom”. A lot of those items are included in his kit, however there are many additional items that I selected due to what I find the children I work with are drawn to most. There is also the addition of Sand Tray and miniatures (which represent the categories above as well as Sand Tray categories for miniatures) also making it a larger and more comprehensive kit. Lastly because I also do Cognitive Behavioral Play Therapy I included more directive items such as cards, a dice, stickie hands, and a folder for art and projects. However, as we know those items can also be used to do almost anything a child may want. So without further ado here is the source list for the comprehensive Play Therapy Kits: Containers: Shoe Box Tote *these appear to be out of stock but most Target, Walmart, or Dollar Tree stores carry these for around $1.00. Make sure the top is flat if you are going to create a stove on top. Check out this link HERE for a free printable to turn the top of the shoe box tote into a stove! Sand Tray Tote *If you wanted to only have one tote this would likely fit it all BUT the top isn’t flat enough to be a stove, so if you want a cooking area you might print and laminate a sheet of paper to just sit on top or the floor. Grab a set of free downloadable and printable labels for kits HERE! Orientation Handout: I created a handout to orient parents and children to the Play Therapy kits including frequently asked questions, a list of rules, and an inventory. Grab your free printable (and editable) copy HERE! Sand Tray and Miniatures: Check out this post HERE for a comprehensive list of sources for all the miniatures and sand. I included a dice in the miniature but BUT it is a great took to take out and use for Cognitive Behavioral Play Therapy. Also, if you are transporting the sand tray, store the sand it a Zip Lock bag…trust me. Toy Tote: Dish/Pot and Pan set *these have enough for silverware, a cup, and a plate for 4 kits. They only had a pot/pan for 2-3 depending on what you want in your kits, but the Dollar Tree had a set with a frying pan, egg, knife, and spatula all for $1.00 so I purchase several to supplement. Princess Kit (crown, wand, ring in a 10 pack) *For the price and number of items you get, these were much cheaper than the Dollar Tree, where it was $1.00 for one crown Babies *I LOVE that each of them has an outfit you can take off AND that they are multicultural. When I purchased they were $28.00, so watch out for a sale! The Dollar Tree also has plush multicultural dolls, but they are all female. These come in both gendered/neutral colors and the Dollar Tree ones are in dresses and not infant like. Glue Sticks, Markers, Crayons, Play Therapy Folders – at Target on discount for back to school, the BEST time to refill your art supplies! Baby Blanket *I cut up one yard piece of fleece to make over 10 blankets. You can choose any pattern or hit up a sale at your local fabric store! Doctor Kit (Stethoscope, Syringe (Dollar Tree 4 pack), cotton ball, tongue depressor, band aids (make sure if they are “skin color” all skin tones are represented. If not characters are great!), and medicine bottles. If you are only making one kit a used (empty) medicine bottle from your home or a friend/family member will work great!) Toy Gun Food (9+ items per kit) Play Money *The Dollar Tree also has play money Baby Bottle *these are meant to be party favors but you can get a TON for a great price. I had my husband drill a hole in the nipple of the bottle to make that part less of a choking hazard, even though it is fairly big. You could also hot glue the whole thing together! Printable Doll House *I designed a pop up free printable doll house that I laminated with a bathroom, bedroom, kitchen, and living room. With laminated sheets it is also super wipeable. Stay tuned for the link for the free download! Dollar Tree: Playing Cards (2 pack) Police Kit (badge and walkie talkie) * I choose to purchase these for the walkie talkies but decided to leave out the guns that came with it because although bright orange they appeared a bit too realistic Bubbles (3 pack) Pom poms (multipack) Play Dough (8 pack, 2 per kit) **Check out this post HERE for miniature items that also came from the Dollar Tree Materials from my office: I have a big craft supply at my office so I dug into the stash as well as my treasure chest for these items. Balloons Stickie Hands Pipe Cleaners Popsicle Sticks Googly Eyes Construction Paper 2 Envelopes 2 Paper Bags The Breakdown: Each kit comes in 2 containers, around 170 individual items and cost around $75.00 per kit. The great news about these kits is that I wanted to make them as comprehensive as possible so I did include a lot of stuff. It was an investment I was willing to make in my Play Therapy practice as I knew I would be playing apart for some time, and then when returning to office still likely using the kits for the first bit. Here are some of my kits ready to be picked up by clients! Seriously for how many hours I put into these I felt like I was giving away my first born child (I'm only kind of joking)! But seriously I am hoping this source list saves you a boat load of time if you are thinking about creating these for your clients! Both totes are labeled with numbers (ie Kit 1, Kit 2, etc.) so the matches can stay together and I have a list of what client is in possession of what kit. Also, the awesome thing about this source list is it is so easy to pare down. You can select less to fit your budget. Amazon also has fluctuating prices. Sometimes if you keep an eye on something and come back there will be a sale and discounted pricing. Lastly, if you are making multiple kits you can hit that price point much easier than if you were only doing a single kit, because most come in multi-packs. If you are just starting up and looking for a single kit, pair with other Play Therapists and cost share the price of the kits! Have you started the journey of Play Therapy Kits? What is your most loved item in the kit? Let me know in the comments below! Want to know more about setting up your play therapy office or practice? Check out this training HERE! Let's Connect - click here to join my email list!
17 Comments
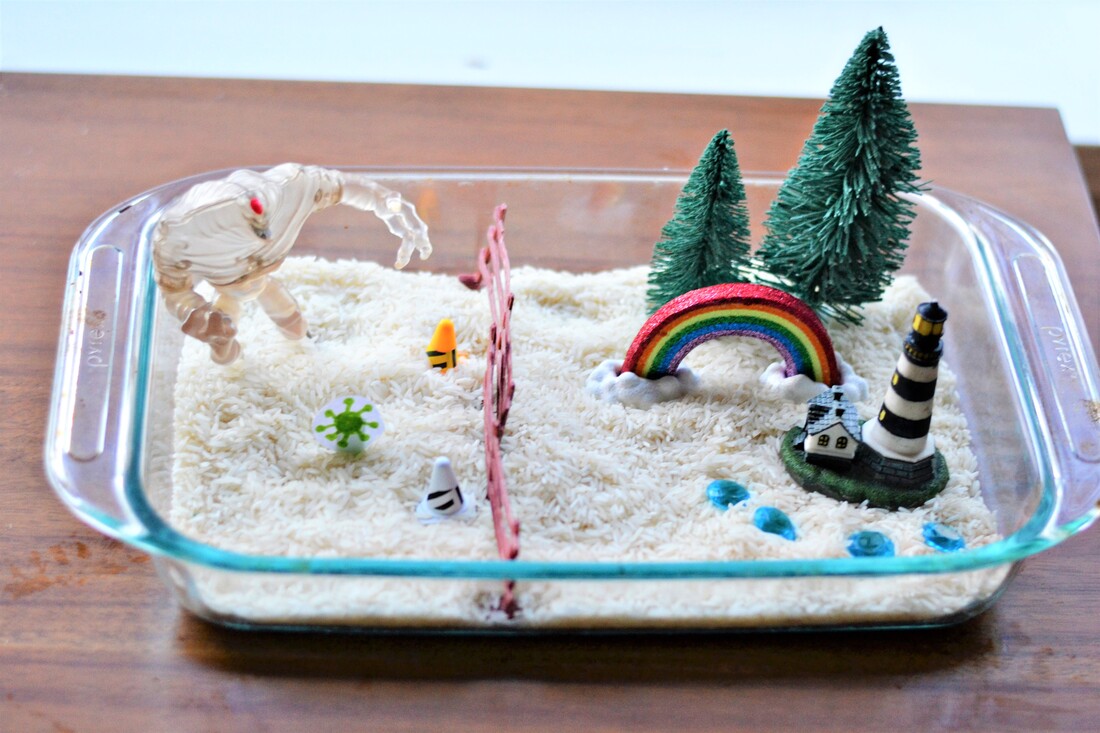
I like to say that I was “born for the tray”. I spent my childhood collecting actual sand from beach vacations, carrying pounds of it hundreds of miles home in backpacks on cars and planes (and through airport security), and collecting tons of knick knacks. What a wonderful surprise when I found out that these knick knacks actually were something very valuable called miniatures and I would grow in my adult life to collect hundreds of them for my job! And some of those knick knacks from childhood? They sit on my sand tray miniature shelves in my office today. When shifting to virtual sessions one of the things I have such a hard time transitioning was the power of Sandtray. There are so many great ideas for virtual technology trays like Virtual Sandtray but at $169.99 I had a difficult time committing. Other therapists have gotten creative and used a Whiteboard App or Paint3D for free to create visual worlds with clients through screen share. For me, while digital is an amazing alternative for still utilizing Sandtray with clients while you are engaging in Tele-Play, it was missing the tactile kinesthetic and sensory element that the sand and miniatures in office brings. I wanted to share three ways for those who are not quite tech savvy or who are also missing the sensory and touch experiences of Sandtray to continue to support clients virtually. Your Own Tray For this option you literally use your own tray or portable tray and your own miniatures. A major benefit to this is that the children you work with are already familiar with your miniatures and may find comfort, meaning, and metaphor in using miniatures that they previously used in office. You as the therapist manipulate the sand and select the miniatures and placement – all dictated by the child. Joel Lambrides an LPCC and RPT from Minnesota shows an amazing video of how to set it up HERE! He uses a brilliant fixed camera system (cell phone) that can be placed over the tray to create an aerial view. Another take on this would be a two camera system with a Telemedicine platform that could have more than one “client” where the therapist has both the phone fixed over the tray and another device to maintain eye contact and communication with the child. Draw Your World I first talked about this technique HERE. For this type of Sandtray have the client or parent tape together four sheets of computer paper in a rectangle. You can have the client start out by drawing what kind of ground the “tray” will have on the paper. Will it be grass, rocks, lakes, rivers, mountains, or volcanoes? The sky is the limit! Then, do your sand tray work as usual adding in miniatures to tell the story and create the world. I love this technique because it allows clients to be in control and touch, place, and re-arrange the world. How do clients gather miniatures? Don’t worry – keep reading! I have you covered below. “Sand” Tray Okay – I saved my favorite for last! For those that know me know that I started out my Sandtray journey with a tray of corn. I have experimented over the years with other mediums besides sand to create trays and have enjoyed seeing the different dynamics that come out with each. SO as I was brainstorming how to help clients get not only the movement and placement control (as with the technique above) I also wanted them to have a sensory experience of sand as well. Do you know what feels kind of similar to sand AND most families either have on hand or can get for a reasonable price? RICE! Most families also have some sort of casserole pan or cake pan – thus the “Sand” Tray of a casserole pan filled with uncooked rice was born! Now – on to the miniatures! Selecting and Creating Miniatures Most clients have some sort of miniature collection in their house. These could be action figures, toy soldiers, princesses, or if they are like me – knick knacks! I give clients a list of the categories of toys and encourage them between sessions to go on a hunt for minis. I also assure clients that although it can feel overwhelming they really only need a couple of things for each category. I encourage clients to get creative, go outside, and have an eye out for all things mini! Now, there are definitely young people who would only be able to find a select few items in their home. That is totally fine! For these children we create! You can spend a session having the client draw figures they want to be in their tray on paper, finding pictures from the internet to print out, or using stickers. You can adhere pictures to small card stock rectangles (with a bit behind for support and a bit sticking out the bottom) or small pieces of popsicle sticks to get them to stick in the sand. For some young people they may need the supervision and help of a parent for cutting out and pasting/taping. For the young people that draw their world, create a flat base on the bottom with paper – like this genius method HERE! I created a free handout explaining the Draw Your World and “Sand” Tray technique that you can grab to share with clients HERE! What are your favorite ways that you have used the power of sand in the virtual world? Drop a comment below! Let's Connect - click here to join my email list!
|
Hi, there!I'm Ann Meehan, an LPCC, Loading... Archives
July 2024
Categories
All
|
Privacy Policies | Terms of Use | Disclaimer
Contact
[email protected] | Copyright Meehan Mental Health Services 2022
Contact
[email protected] | Copyright Meehan Mental Health Services 2022


